Imagine your car's engine as a well-oiled machine, each part playing a crucial role in its smooth operation. Now, picture the coil pack as a hidden hero, silently igniting the fuel that keeps your engine running.
But what happens when this hero gets dirty and starts to falter? You're left wondering how to revive it and keep your engine purring like a contented feline. Fear not, for there is a simple solution that can bring back the spark.
Key Takeaways
- Use proper tools and cleaners for efficient and thorough coil pack cleaning.
- Follow safety precautions like disconnecting the battery before removing the coil pack.
- Gently clean the surface and inspect for damage before reinstallation.
- Test resistance levels and inspect for abnormalities to prevent engine issues.
Tools Needed for Cleaning Coil Pack
When cleaning a coil pack, using a 5.5mm Socket and 7mm Socket is crucial for removing the coil pack bolts effectively. These tools ensure a secure grip on the bolts, preventing any damage during the cleaning process.
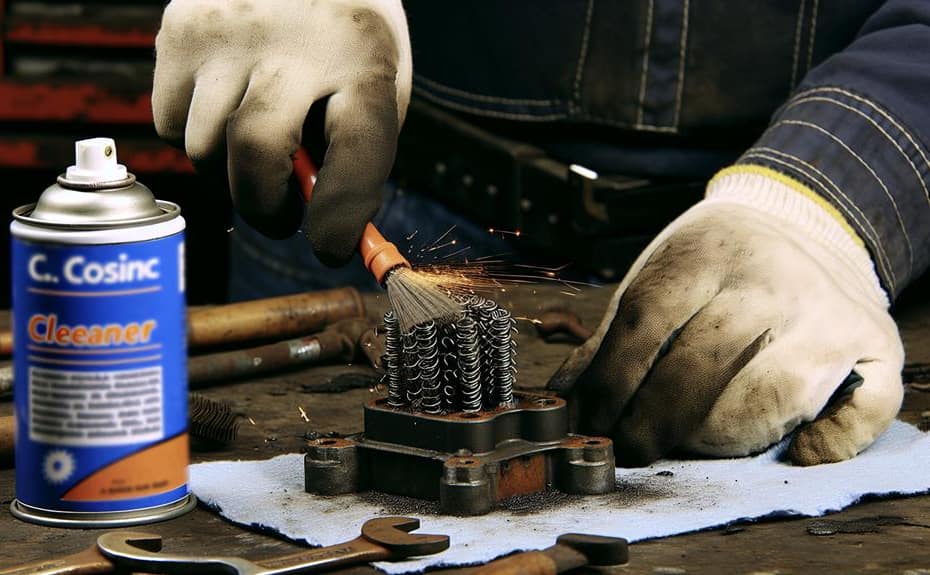
To effectively clean the coil pack, CRC QD Electronic Cleaner is recommended due to its ability to remove dirt and grime without leaving residue that could interfere with the spark.
After cleaning, applying CRC Di-Electric Grease to the plug connections helps maintain conductivity and prevent corrosion, ensuring optimal performance of the ignition system. Additionally, a soft copper wire brush can be used to gently scrub off any stubborn debris from the coil pack without causing damage.
Having the proper tools such as the sockets, cleaner, grease, and brush is essential for a thorough and efficient cleaning process. By utilizing these tools correctly, you can ensure that your coil pack is free from contaminants and operating at its best, providing a reliable spark for your engine.
Steps to Remove Coil Pack
To properly remove a coil pack, ensure you have disconnected the negative battery cable for safety and use a 5.5mm socket to loosen the bolts securing the coil pack.
Start by locating the coil packs on the engine – they're usually connected to the spark plug wells. Carefully unplug the coil pack cylinder by gently pulling it out. Once detached, remove the boot to access the coil for cleaning. This step is crucial to effectively clean the ignition coil.
Use air intake cleaner to eliminate any residue such as dirt, debris, or oil buildup that may have accumulated on the coil. Remember to inspect the plug wires connected to the coil pack for any signs of damage or wear.
Following these precise steps will help maintain optimal performance of your engine's ignition system and extend the longevity of your coil packs.
Cleaning the Coil Pack Surface
Consider utilizing a soft brush or cloth to gently scrub the surface of the coil pack, ensuring effective removal of dirt and grime. It's crucial to clean the coil pack surface without exposing it to water directly, as this can lead to damage to the electronic components.
If there's stubborn residue on the coil pack, you may want to use a mild cleaner or electronic parts cleaner spray. When cleaning, be cautious of oil residue, which can be present and impact the performance of the spark plugs and the overall ignition system.
Avoid using brake cleaner on the coil pack, as it may be too harsh for this component. After scrubbing, wipe down the coil pack surface with a clean, dry cloth to guarantee it's free of any cleaning residue before proceeding with the reinstallation process.
Reinstalling the Coil Pack
For a successful reinstallation of the coil pack, ensure all connections are securely aligned and tightened according to the manufacturer's torque specifications. Start by carefully placing the coil pack back into the designated cylinder, taking care not to damage any components. Securely attach the boot to the spark plug to maintain proper electrical contact. Before reconnecting the battery, double-check all wiring and connections. Tighten the 10mm bolts to the specified torque to prevent any loose connections.
When reinstalling the coil pack, ensure that no residue from the coil cleaning process remains. This will help maintain a clean ignition system. Take your time aligning the coil pack with the plug wire and cylinder. Following the correct steps will help prevent any misalignment issues that could lead to poor performance or misfires. By following these instructions, you'll reinstall the coil pack correctly and ensure proper functioning of the engine with clean coil packs.
Testing the Coil Pack
After reinstalling the coil pack following proper alignment and tightening procedures, the next step is to test its functionality by checking for proper resistance levels using a multimeter.
To begin, set your multimeter to the ohms setting. A healthy coil pack typically shows resistance between 0.75 to 0.81 ohms. Place the multimeter probes on the corresponding terminals of the coil pack and note the resistance reading.
Testing for continuity in the coil pack can help identify internal shorts that may affect its performance. Remember to inspect the coil pack for any cracks, burns, or physical damage during testing. Proper testing ensures the coil pack is functioning correctly, aiding in diagnosing ignition system issues accurately.
If resistance levels are outside the normal range or if there are signs of damage, it may be time to replace the coil pack. Testing the coil pack is crucial for engine performance; it can prevent issues like misfires or a check engine light.
Frequently Asked Questions
What Can I Use to Clean Coil Pack?
To clean a coil pack properly, use CRC QD Electronic Cleaner for best results. Apply CRC Di-Electric Grease after cleaning. Utilize a soft copper wire brush to remove debris. Avoid water or harsh chemicals. Regular maintenance enhances engine performance and prevents issues.
How Do I Know if My Coil Pack Is Burnt Out?
To determine if your coil pack is burnt out, check for symptoms like engine misfires or rough idling. Use a multimeter for testing. If resistance values are off, consider replacement. DIYers can refer to manuals or seek professional help.
How Do You Clean Oil Out of a Coil Pack?
To clean oil out of a coil pack, you should use a degreaser to remove excess oil, gently scrub with a soft brush, and thoroughly rinse and dry before reinstalling. Avoid forcefully spraying water to prevent damage for effective coil pack maintenance.
Can I Repair an Ignition Coil?
You can't repair an ignition coil. It's best to replace a faulty one for safety and effectiveness. DIY replacements are doable with the right tools and knowledge. Regular maintenance and timely replacements optimize engine performance.
Conclusion
Congratulations! You have successfully mastered the art of cleaning a coil pack. By following these simple steps, you haven't only ensured the smooth functioning of your ignition system but also extended the life of your engine.
Your vehicle will now run more efficiently, with fewer misfires and engine issues. Keep up the good work and enjoy the benefits of a well-maintained coil pack!